Entra SAML SSO
How to set up Single Sign On (SSO) for EntraID SAML.
Requirements: You will need admin access to your EntraID portal.
Provide your Allowed Domain for SSO to the Nebulock team.
Nebulock team will provide you with the following:
- An Audience URI
- An ACS URL
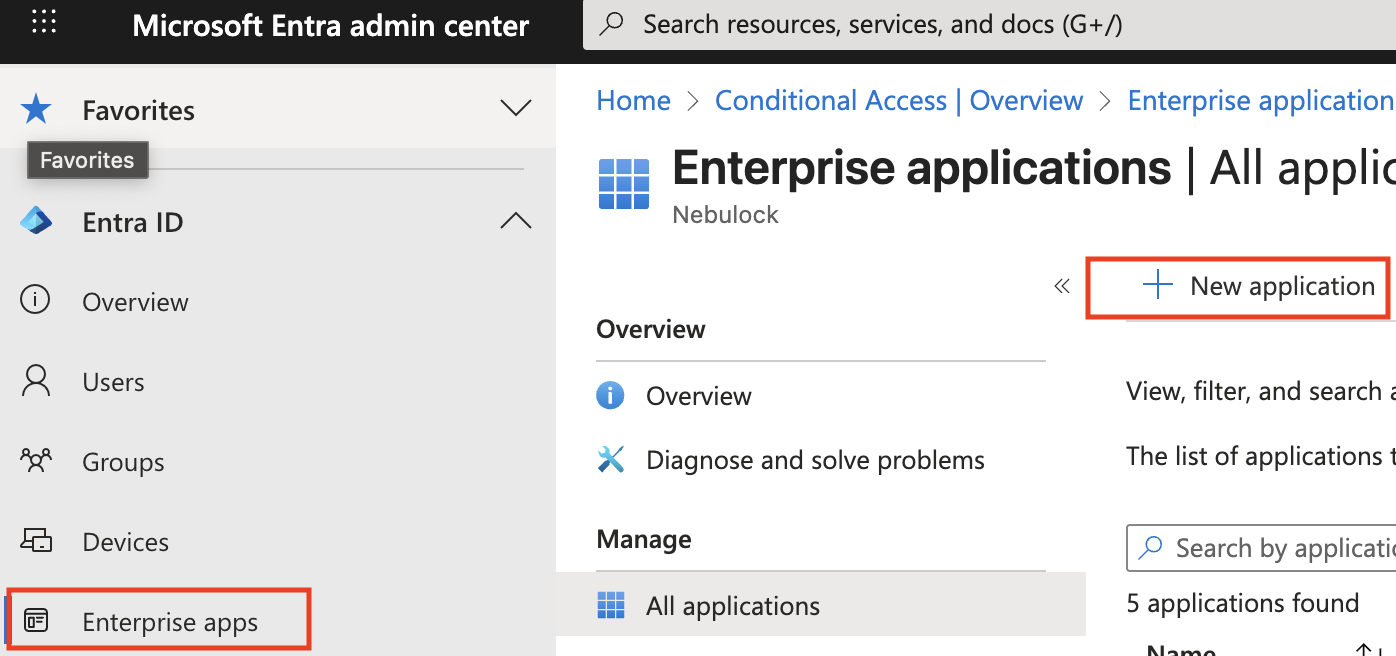
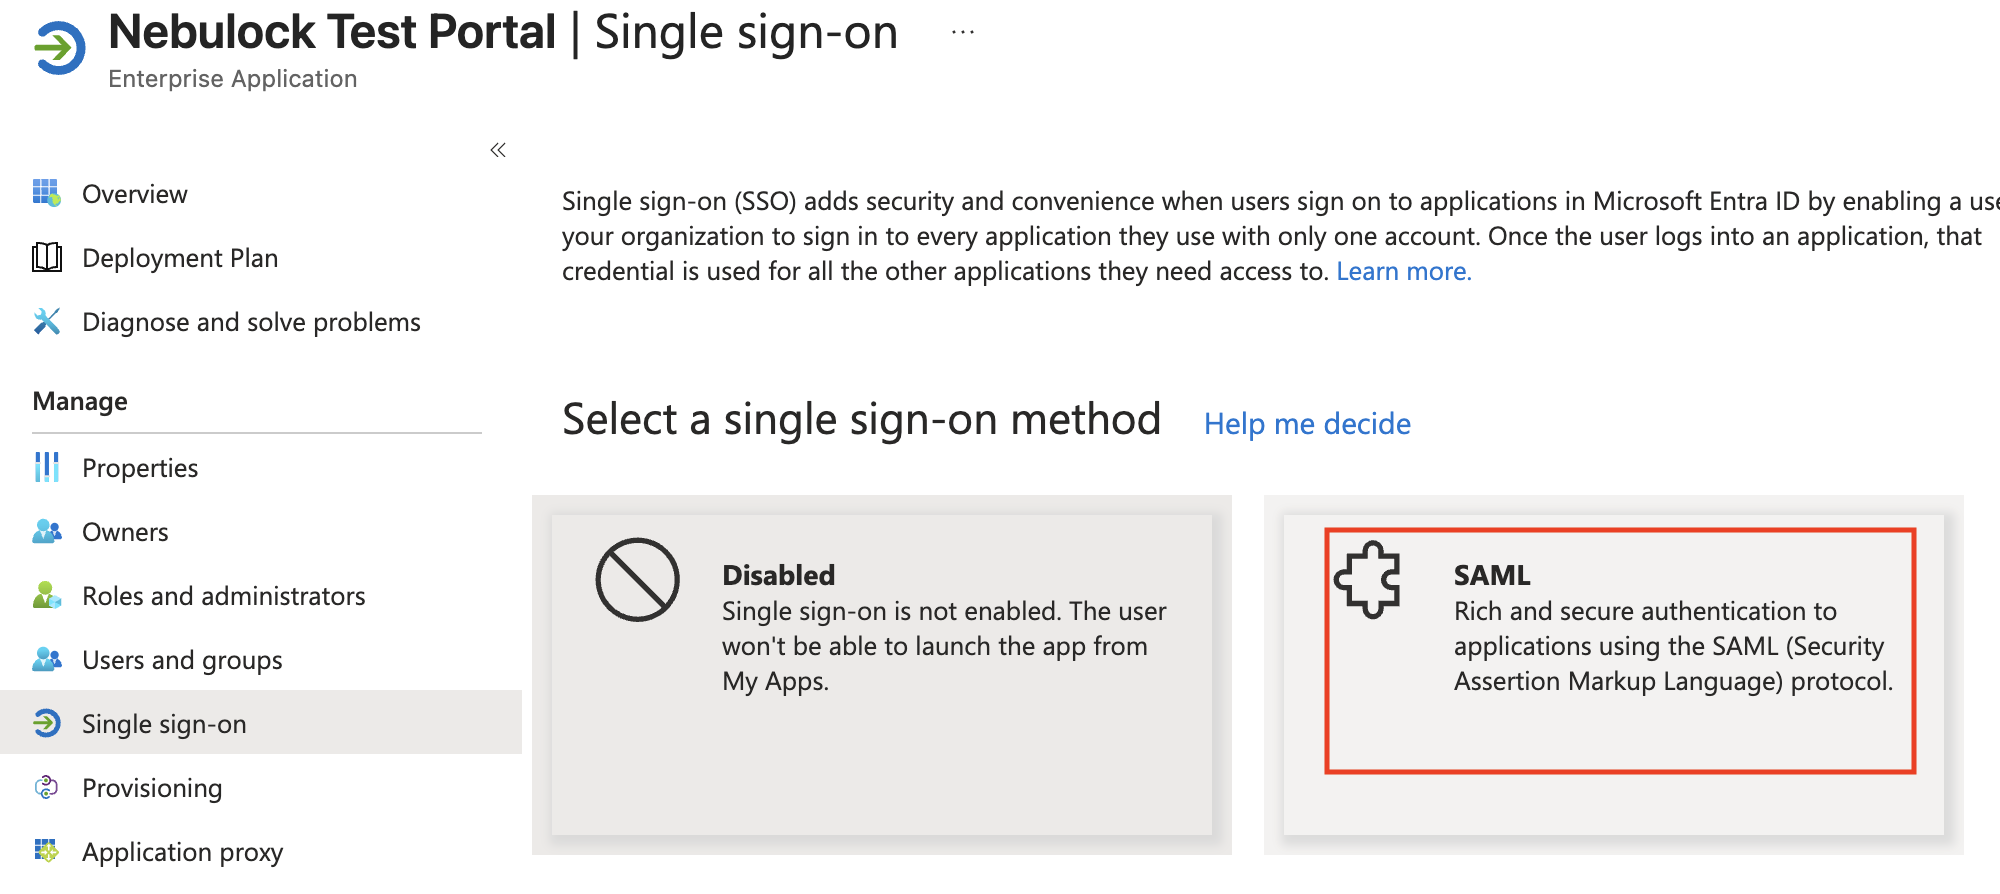
Login to your EntraID portal, and navigate to “Enterprise Apps” and “New application” in the left menu.
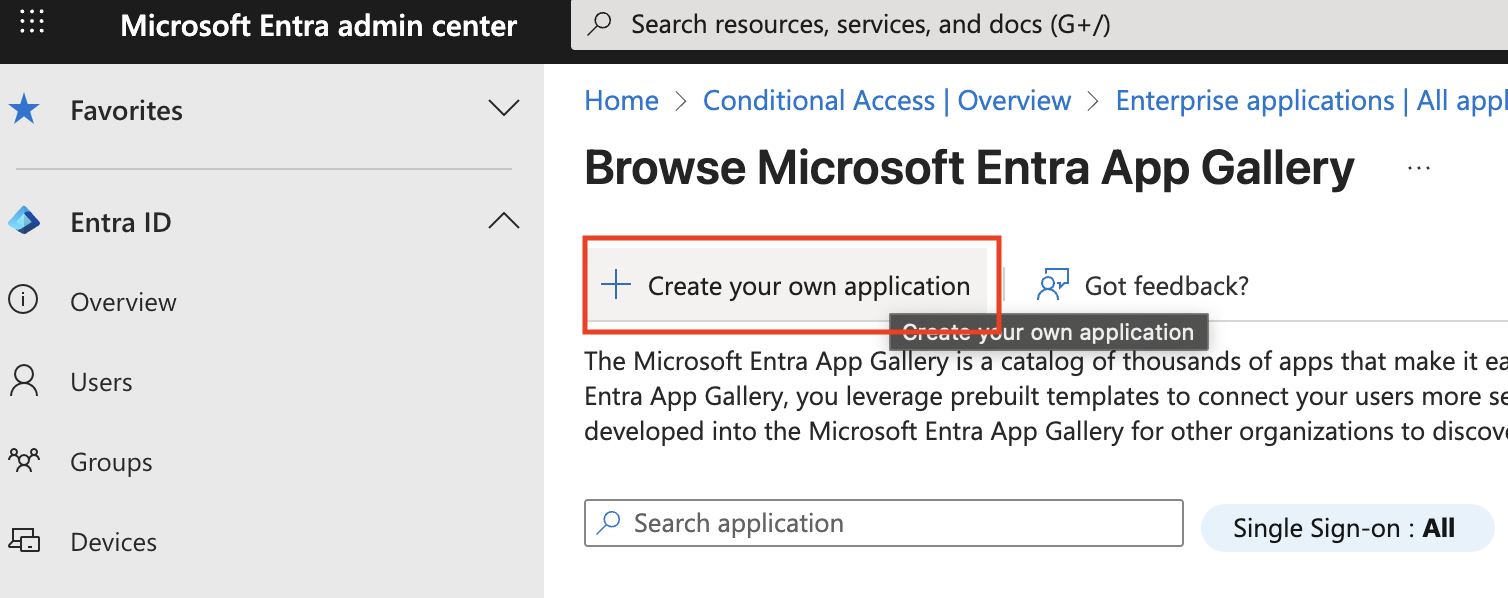
Click “Create your own application”.
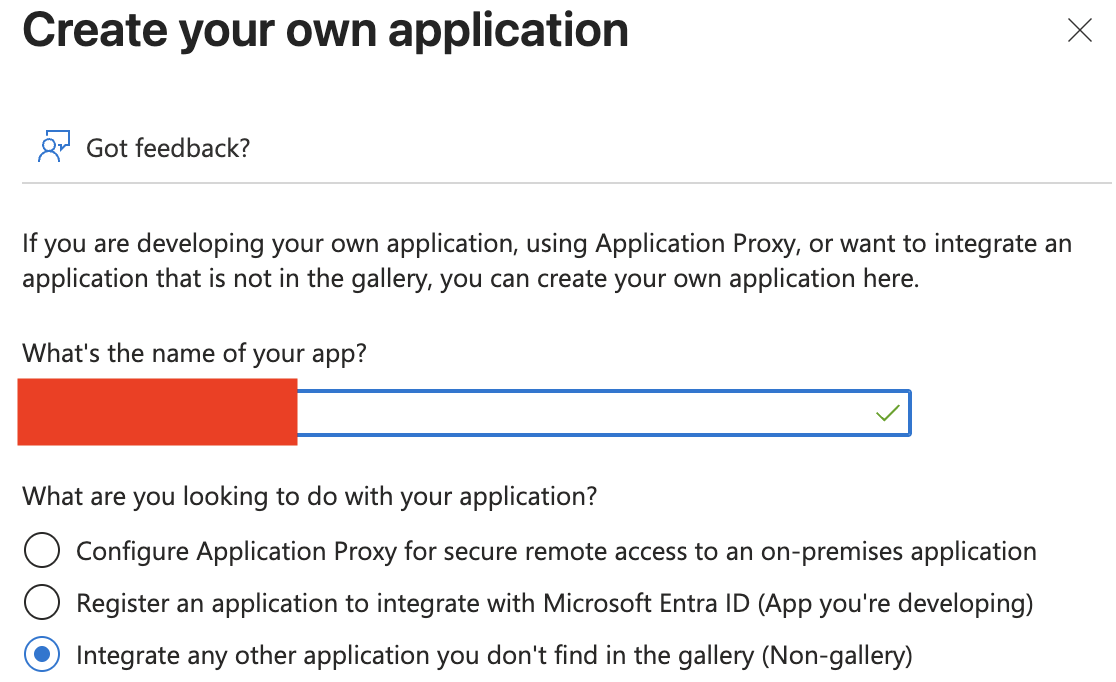
Give your application a name, e.g. Nebulock Platform SSO.
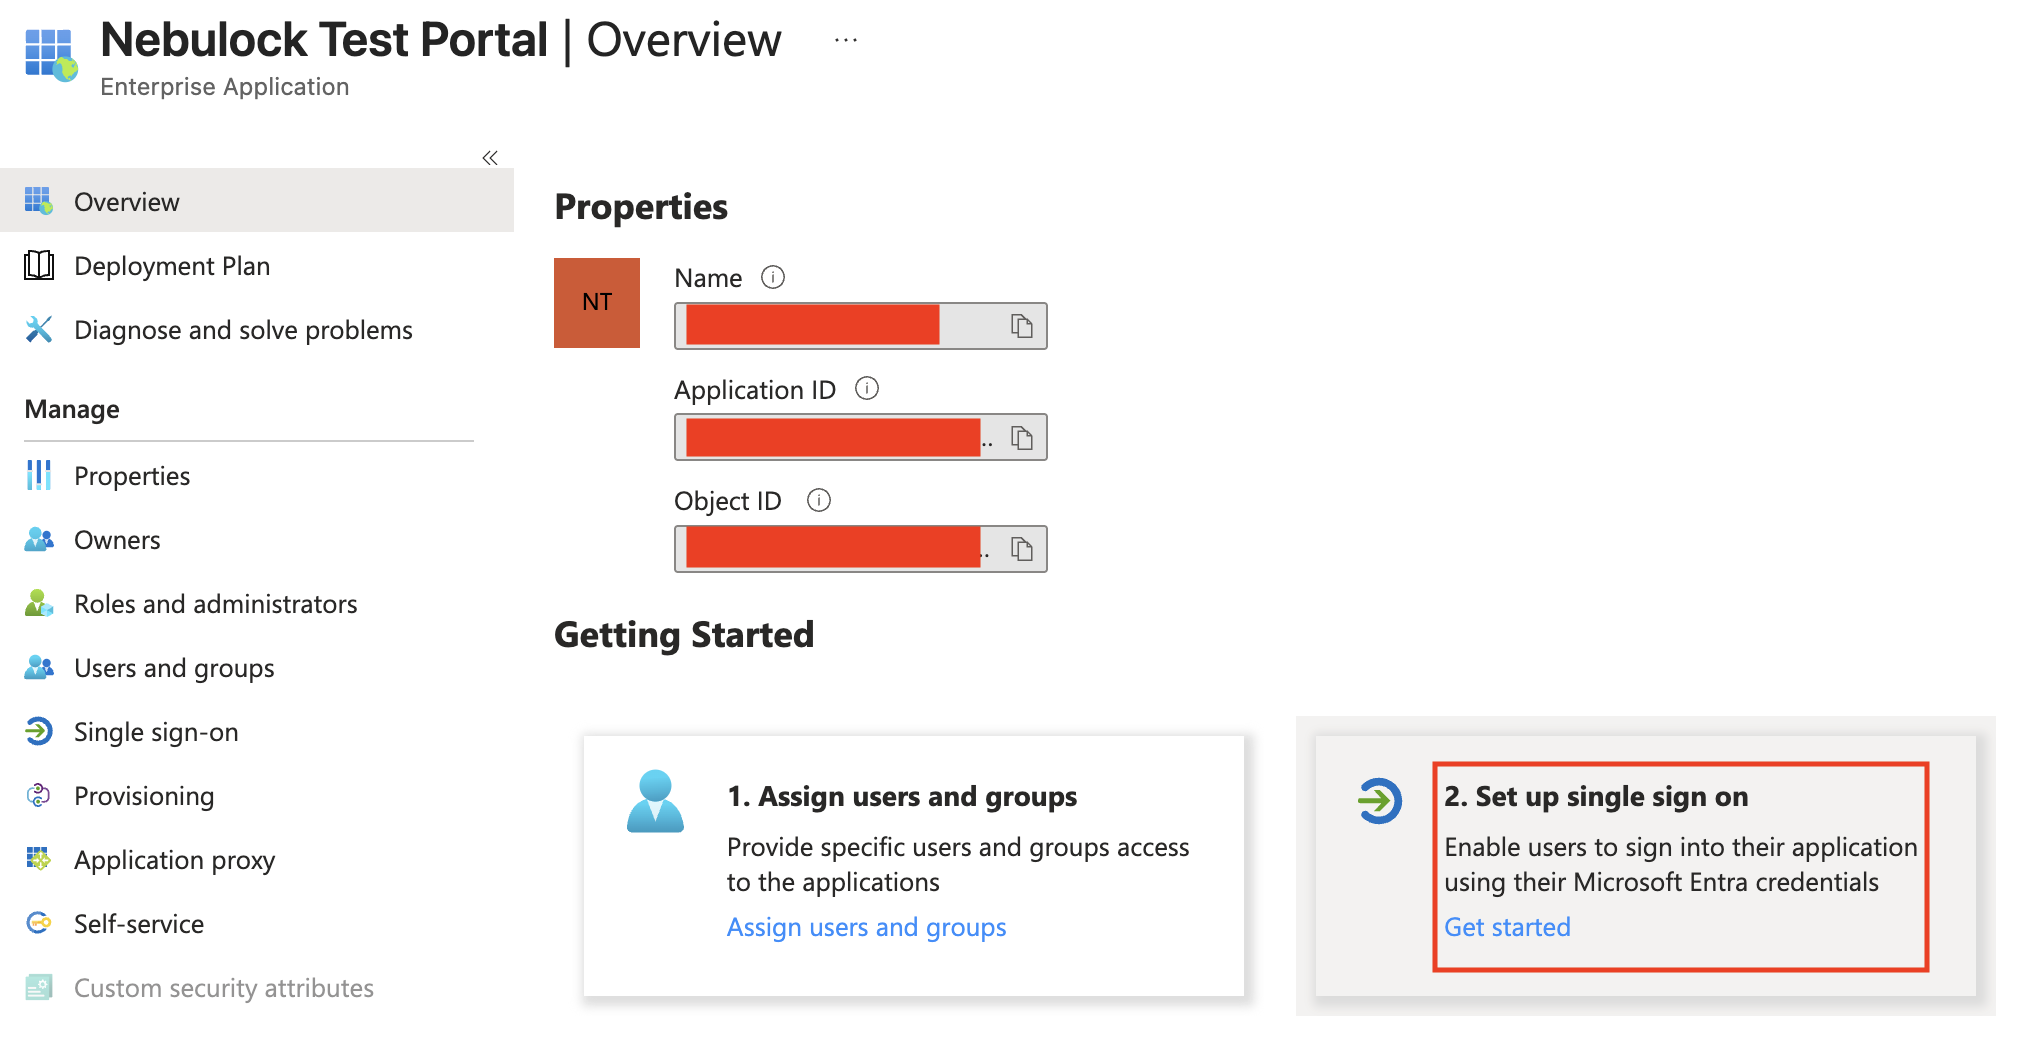
Once the application is created, select “Set up Single Sign On” and “SAML” for the method.
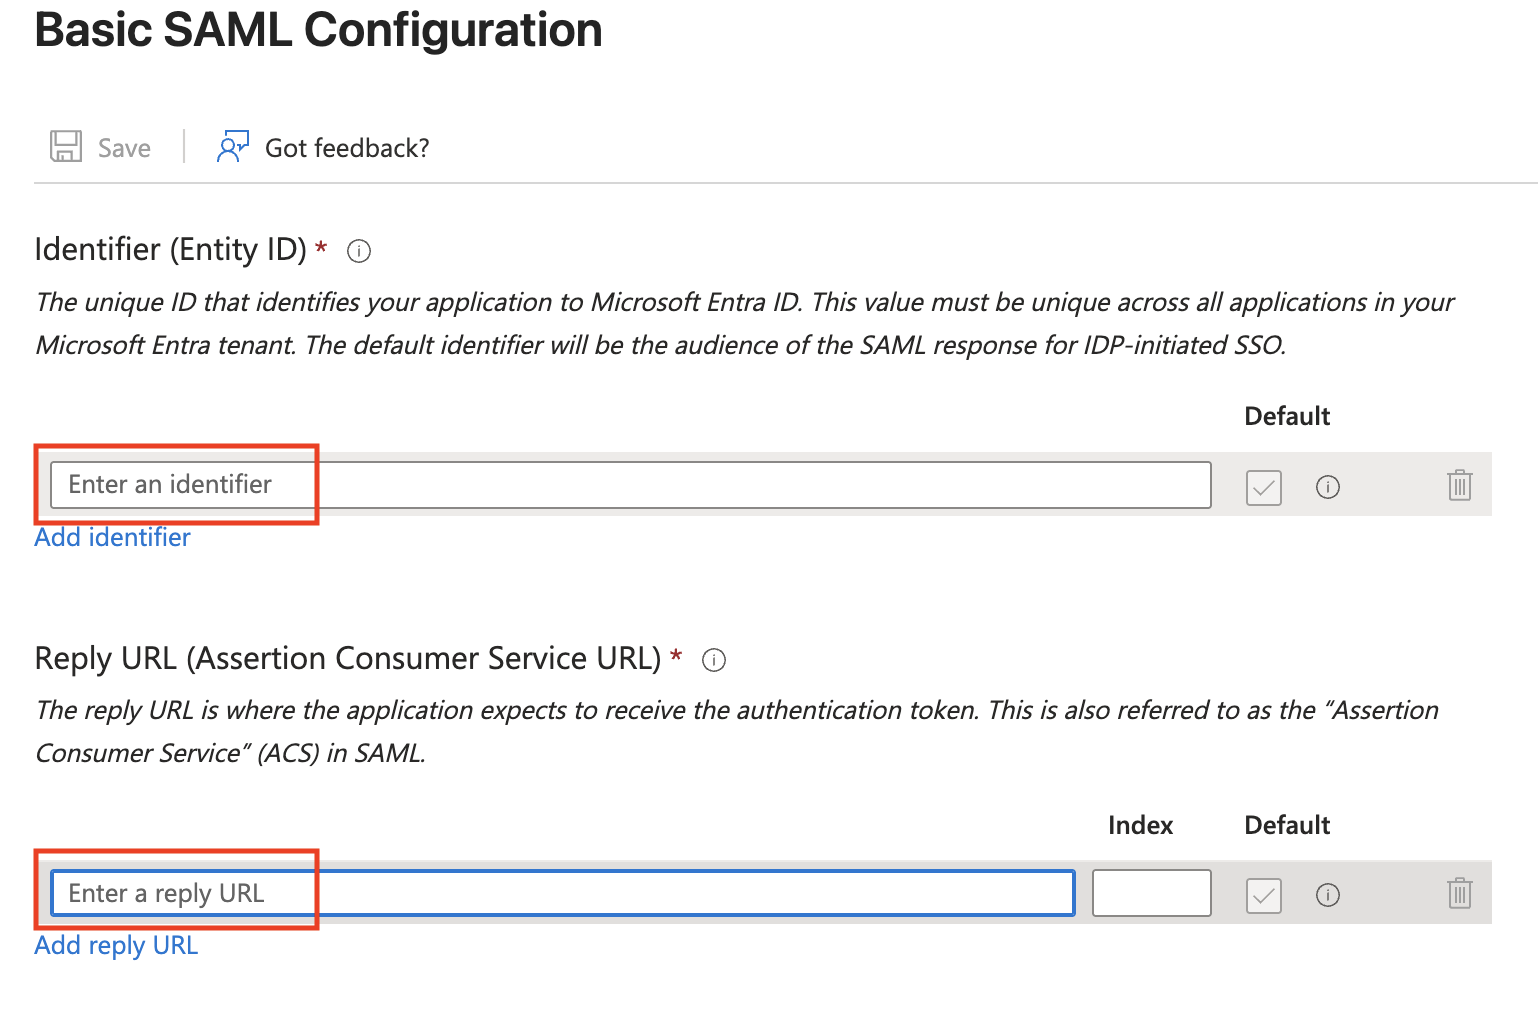
In the “Basic SAML Configuration” section, click “Edit.” Here is where you will paste the information provided by Nebulock. In the Identifier (Entity ID) paste the Audience URI, and in the Reply URL (Assertion Consumer Service URL) paste the ACS URL.
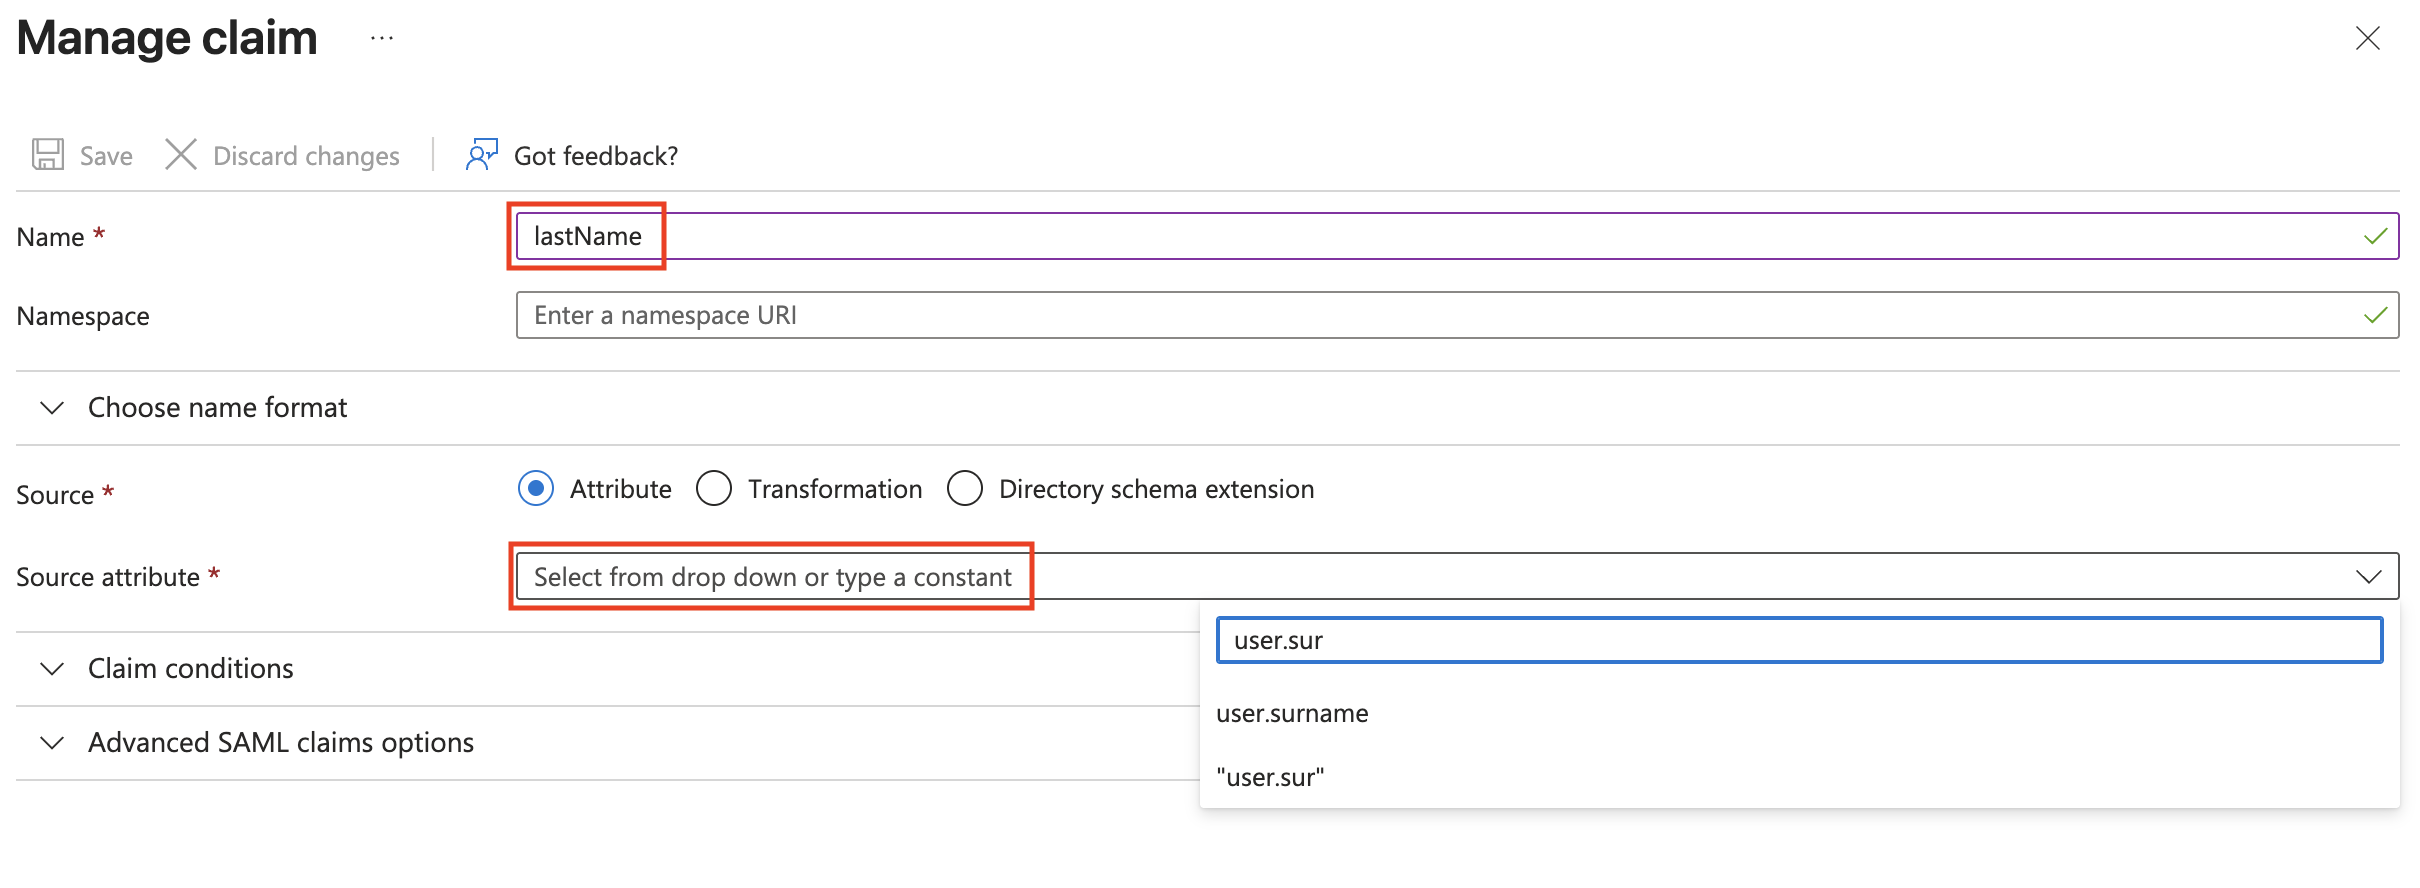
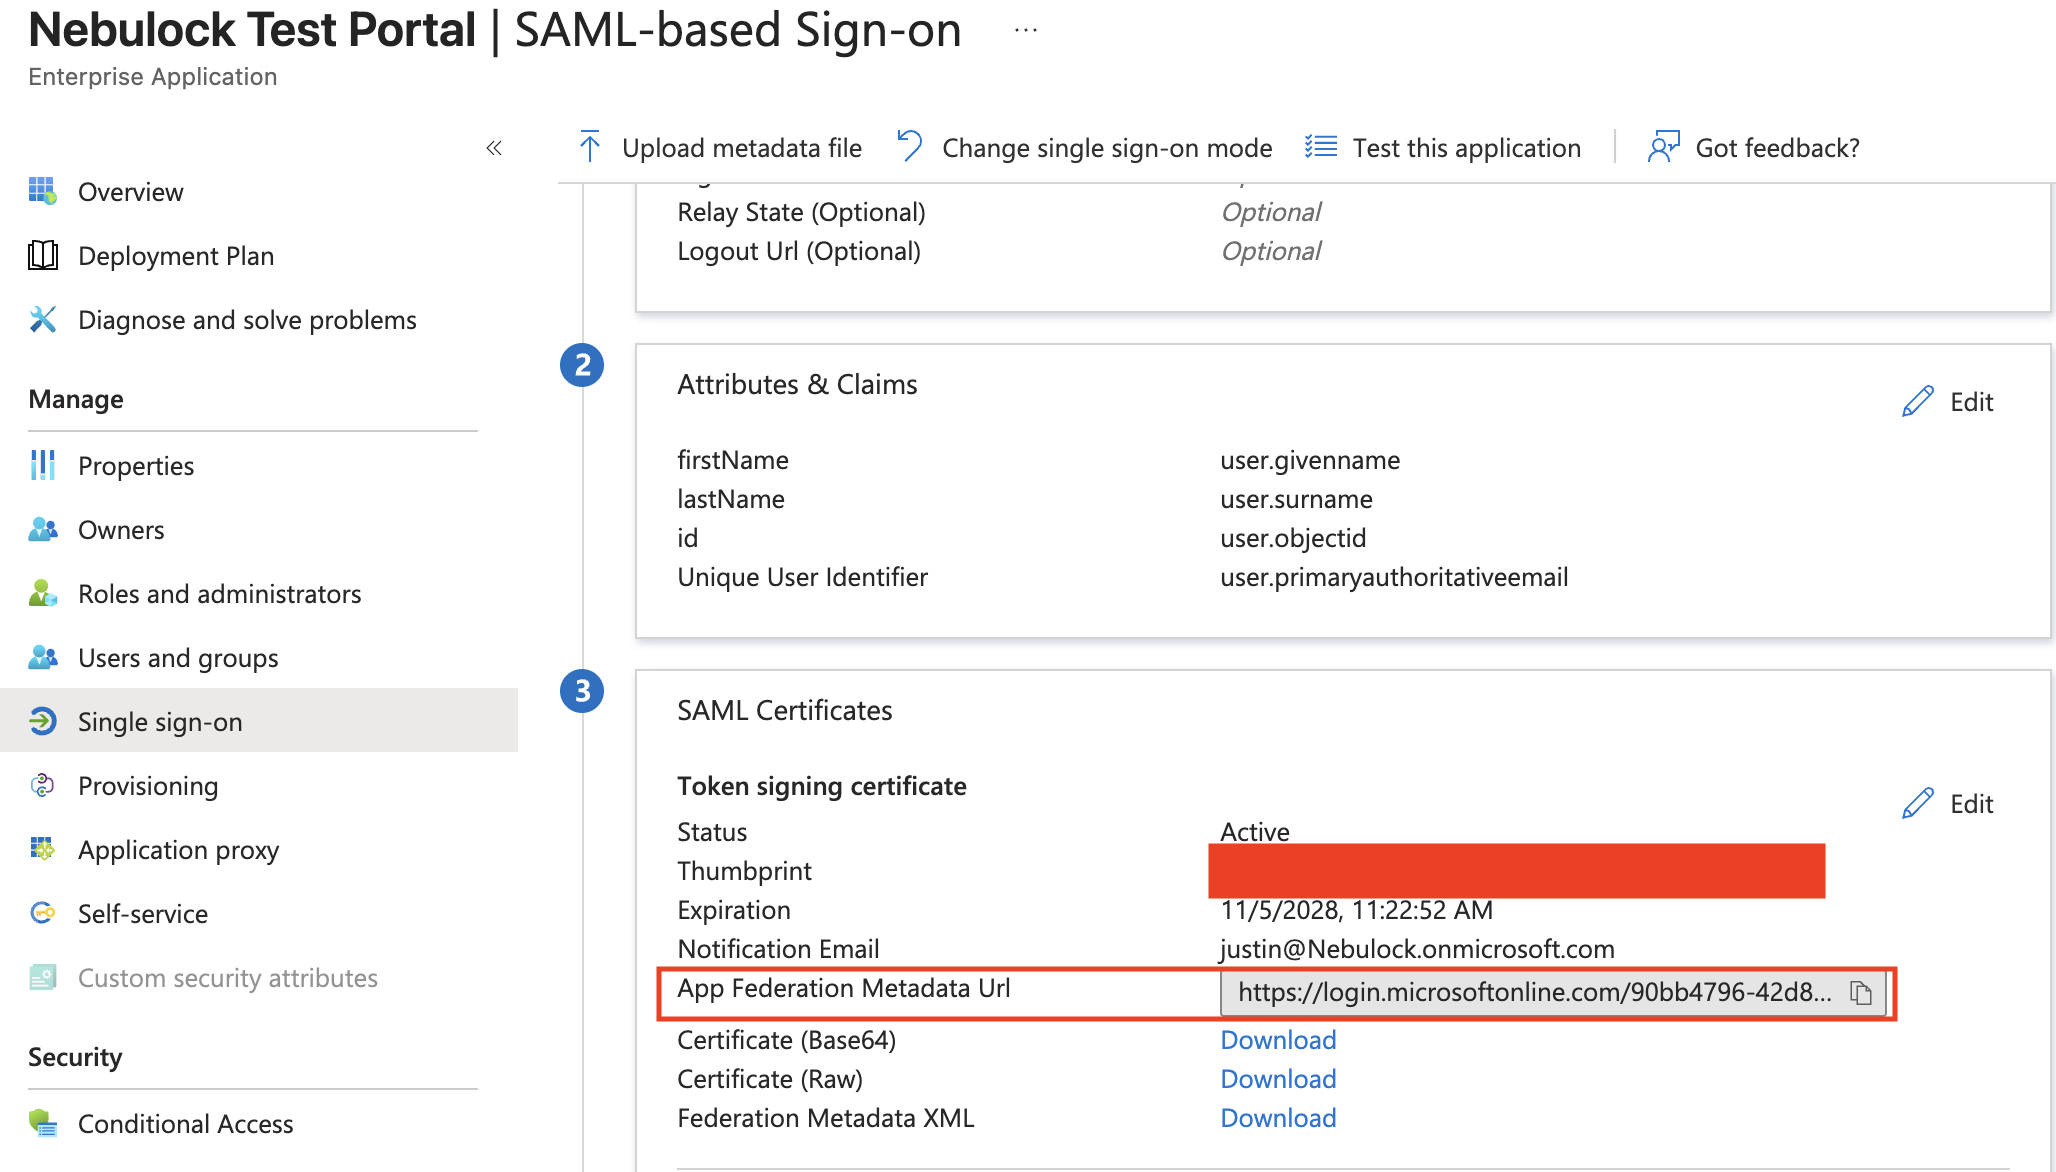
Next scroll down to the “Attributes and Claims” section and click “Edit”.
-
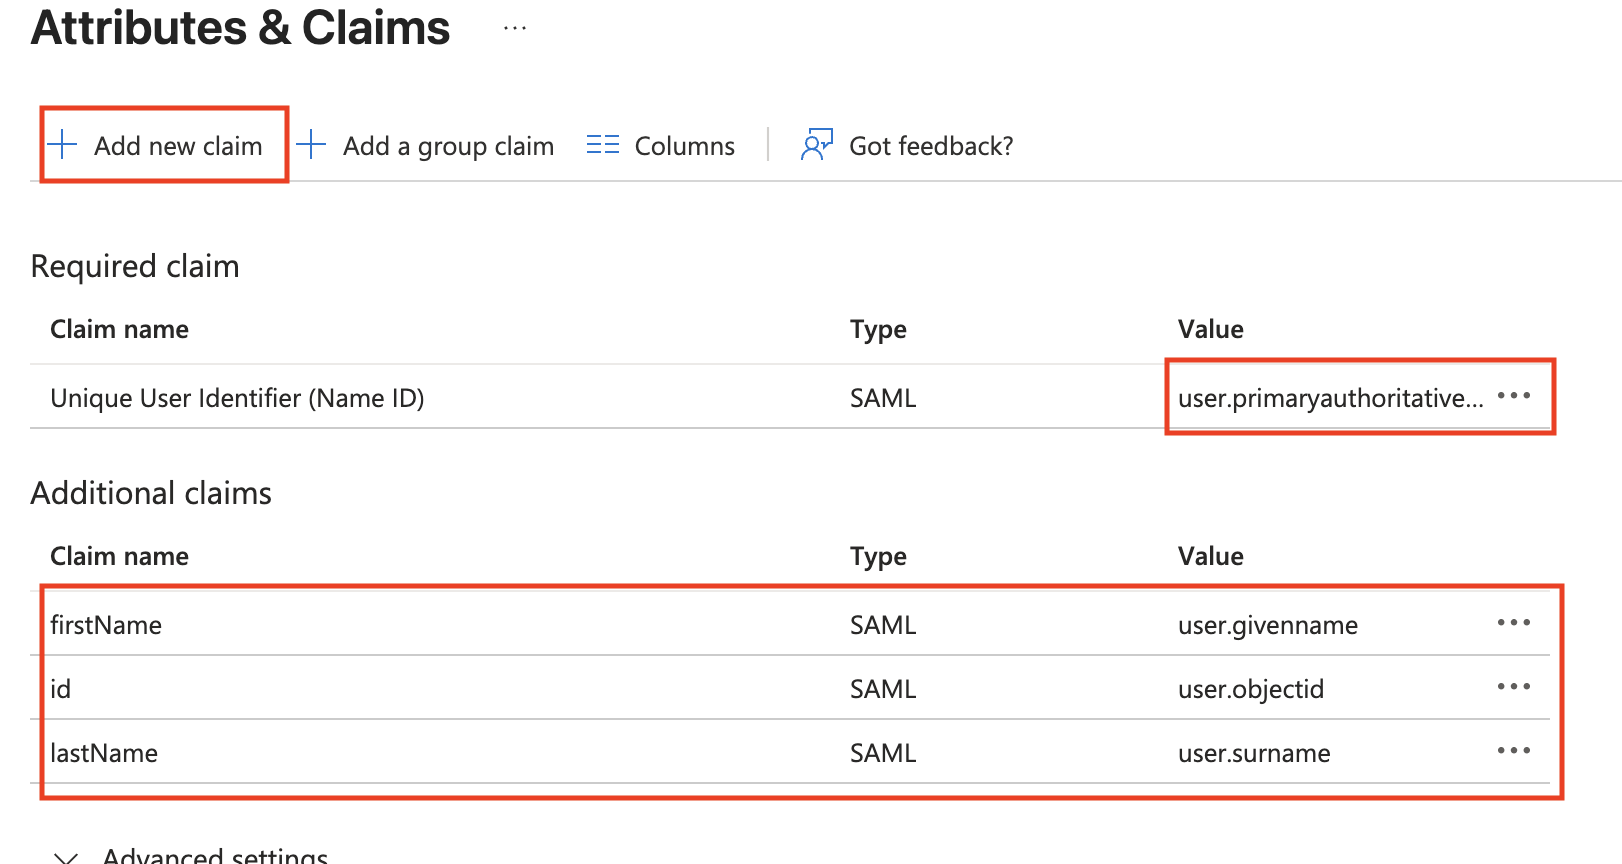
First, update the “Required Claim” and change the “Source Attribute” to
user.primaryauthoritativeemail -
Next, delete the default “Additional Claims”, click “Add new claim” and add each of the below individually.
- Claim Name:
firstName, Source Attribute:user.givenname - Claim Name:
lastName, Source Attribute:user.surname - Claim Name:
id, Source Attribute:user.objectid
Settings should appear like the following:
- Claim Name:
Next copy your App Federation Metadata URL and send this to the Nebulock team.
Now you are ready to add users to the application. Once you have added a user, verify the login is working by navigating to the Nebulock Platform, click "Login with SSO", and enter your domain.